Video Remove Background: Pro Techniques That Actually Work
What Video Background Removal Really Means Today
If you’ve ever tried to remove a video background, you probably remember the headache. It used to mean either setting up a pricey green screen or painstakingly tracing your subject frame by frame—a process called rotoscoping. Thankfully, those days are mostly behind us. The whole approach has flipped from a technical editing skill to an accessible, almost instant feature, all thanks to modern artificial intelligence.
This isn't just a small step up; it’s a complete change in how we approach video editing. Today's AI models can analyze a standard two-minute clip in seconds, identifying and isolating a person with over 95% accuracy when the conditions are right. This incredible speed has unlocked creative options that were once only available to big-budget professional studios. You can even see how fast this area is expanding by checking out the latest market trends behind this technology.
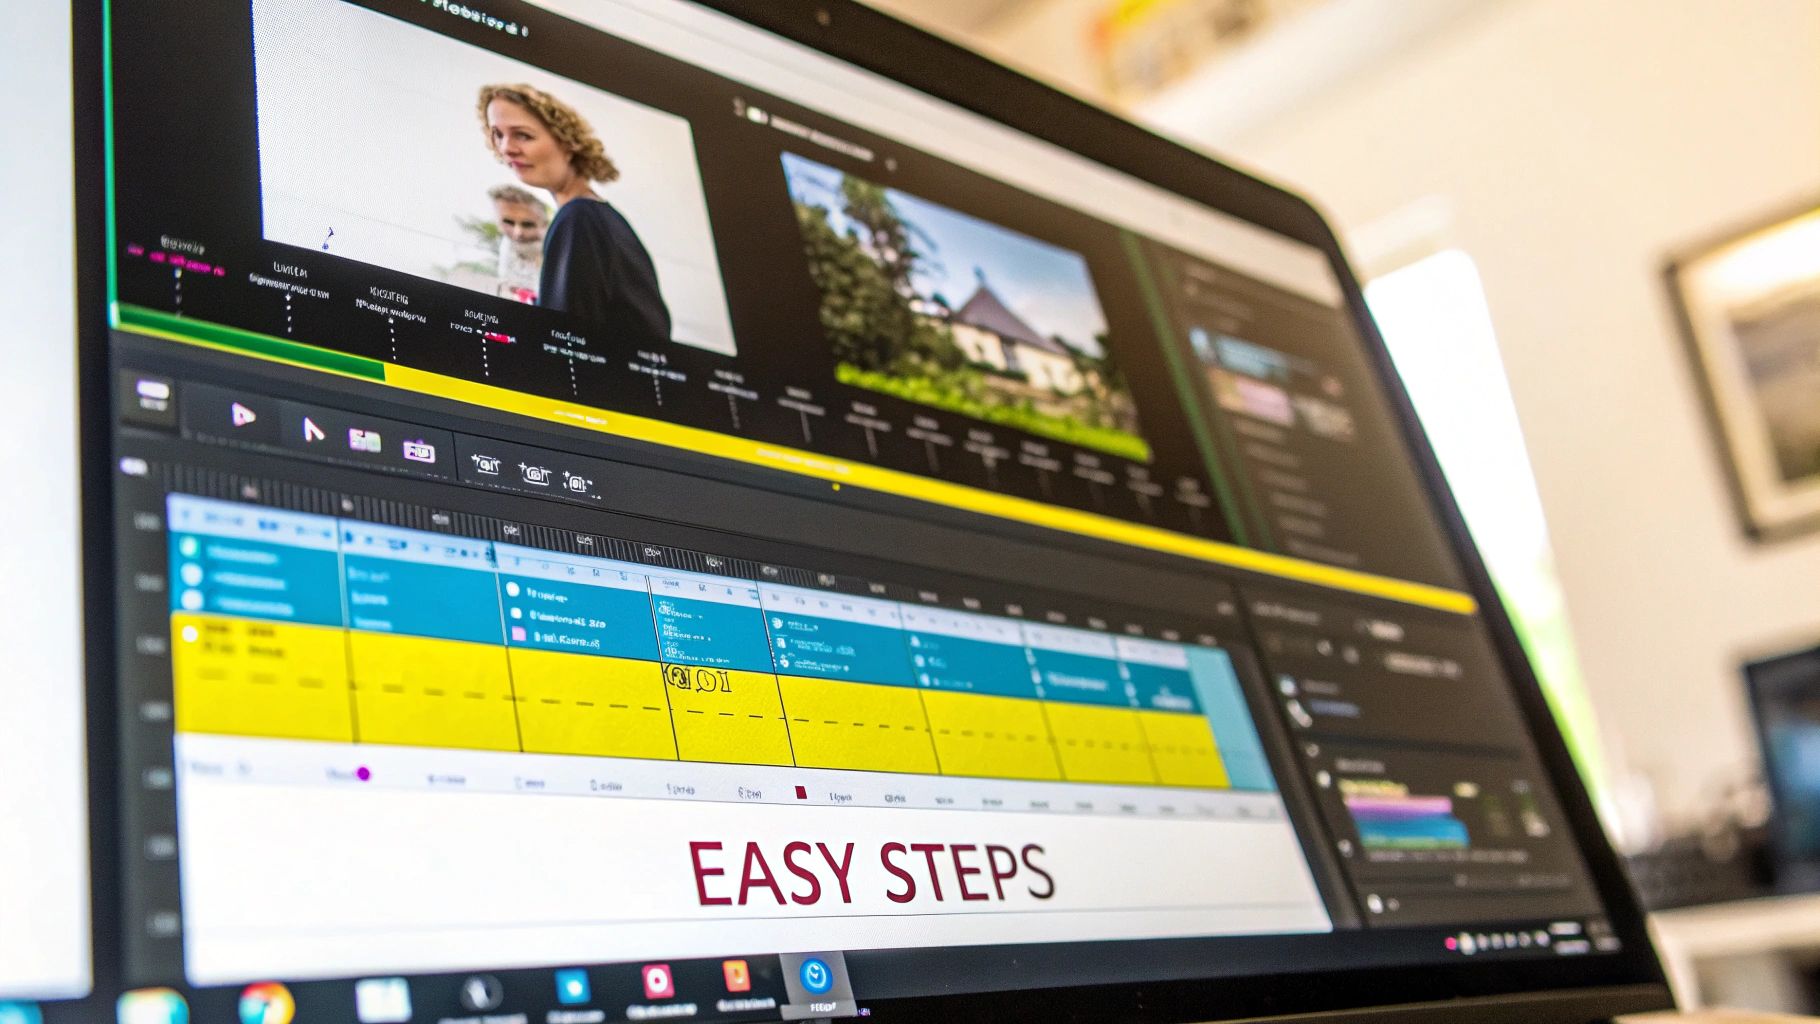
Most web-based tools now have incredibly simple interfaces, showing just how easy this has become for anyone to try.

What once demanded complex software and hours of learning is now often just a drag-and-drop task. To see just how much has changed, a direct comparison is the best way to understand the shift.
Traditional vs. AI-Powered Background Removal
To put things in perspective, let's compare the key differences between the old-school manual methods and today's AI-driven solutions. The table below breaks down everything from the time you'll spend to the skills you'll need.
| Method | Time Required | Accuracy Rate | Cost | Skill Level Needed |
|---|---|---|---|---|
| Traditional (Rotoscoping) | Hours to Days | Variable (High with Skill) | High (Labor/Software) | Expert |
| Traditional (Green Screen) | Minutes to Hours | High (with good lighting) | Moderate (Gear/Space) | Intermediate |
| AI-Powered (Automated) | Seconds to Minutes | High (in ideal conditions) | Low to Moderate (SaaS) | Beginner |
As you can see, AI has made background removal faster, cheaper, and far more accessible. However, this convenience doesn't mean it's a magic wand. The focus has simply shifted from mastering software to understanding the technology's limits and providing it with the best possible source video. If you have specific questions about how these tools work, you might find answers in our detailed FAQ section.
The secret to a clean result is no longer about your editing prowess but about knowing how to shoot video in a way that helps the AI succeed. Even the best tools can get confused by fine hair, motion blur, or poor lighting, which often creates that tell-tale "cutout" look. Understanding these limitations is the first step toward creating a video that looks truly professional.
Finding Tools That Won't Waste Your Time
Trying to find a good tool to video remove background can feel like a wild goose chase. Dozens of apps and websites promise you can do it with a single click, but many leave you with a glitchy, unprofessional mess that’s a complete waste of time. The key isn't to find one "best" tool, but to find the right one for your specific needs, budget, and how good you need the final cut to look.
Decoding the Hype: Free vs. Paid Tools
Let’s be honest, free online background removal tools are incredibly tempting. For a quick talking-head video where the subject isn't moving much, they can sometimes get the job done. They give you a way to test out an idea without pulling out your credit card. However, the cracks start to show when you need something that looks truly professional. Most free tools will limit your video resolution, slap a distracting watermark on your export, or struggle with complex edges, leaving a fuzzy, unnatural halo around your subject.
This is where paid solutions and professional software plugins earn their keep. When you pay for a tool, you're buying more than just the absence of a watermark; you're getting access to more advanced AI, higher resolution exports, and much better performance with tricky footage. These tools are far better at preserving fine details like individual strands of hair and handling motion blur—the very things that make free tools stumble. Think of it as an investment in the final quality of your work.
Key Factors for Choosing the Right Tool
When you're trying out different options, look past the flashy marketing and focus on what actually matters for your final video. Test any potential tool against these real-world benchmarks:
- Edge Accuracy: How clean are the edges? Pay close attention to tricky areas like hair, fuzzy sweaters, or the space between a person's arm and their body.
- Motion Handling: Does the outline around your subject flicker or "boil" when they move? A solid tool will maintain a stable mask, even during faster movements.
- Output Quality: What are you getting back? Check for resolution limits (HD vs. 4K), what file types you can export, and whether the video is heavily compressed, which can ruin the quality.
- Processing Speed: Your time is valuable. A tool that takes an hour to process a three-minute clip might not be practical for your workflow.
The number of tools available is exploding because this technology is growing fast. The market is expected to jump from $10 million in 2025 to an incredible $723 million by 2033. That’s a compound annual growth rate of 46.4%, which fuels intense competition and a crowded field of both great and not-so-great options. You can explore the full market forecast to get a sense of just how quickly this space is developing.
To make your decision a bit easier, we've broken down some of the most popular tools available. This table compares them on the features that matter most.
Top Video Background Removal Tools Feature Comparison
Detailed comparison of popular background removal tools including pricing, features, and limitations
| Tool Name | Price | Video Length Limit | Output Quality | Ease of Use | Best For |
|---|---|---|---|---|---|
| Unscreen | Free (with watermark & 5s limit) / Paid plans from $9/mo | 5 sec (Free), Up to 10 min (Paid) | Low (Free), Full HD (Paid) | Very Easy | Quick GIFs and short social media clips. |
| Kapwing | Free (with watermark & 720p limit) / Pro from $16/mo | 4 min (Free), 2 hours (Pro) | 720p (Free), 4K (Pro) | Easy | All-in-one editing for social media content. |
| Runway | Free (credit-based) / Paid plans from $12/mo | Based on credits | Up to 4K | Moderate | Creators wanting a suite of AI tools beyond just background removal. |
| Adobe Premiere Pro | Subscription from $22.99/mo | No limit | Professional (Up to 8K+) | Difficult | Professional editors who need maximum control and quality. |
As you can see, the free options are perfect for a quick test or a simple GIF. But for high-quality, longer videos without a watermark, a paid subscription is almost always the right move.
This data visualization helps break down the classic trade-off you'll face: you can get something fast and cheap, but high accuracy usually costs more in either time or money.
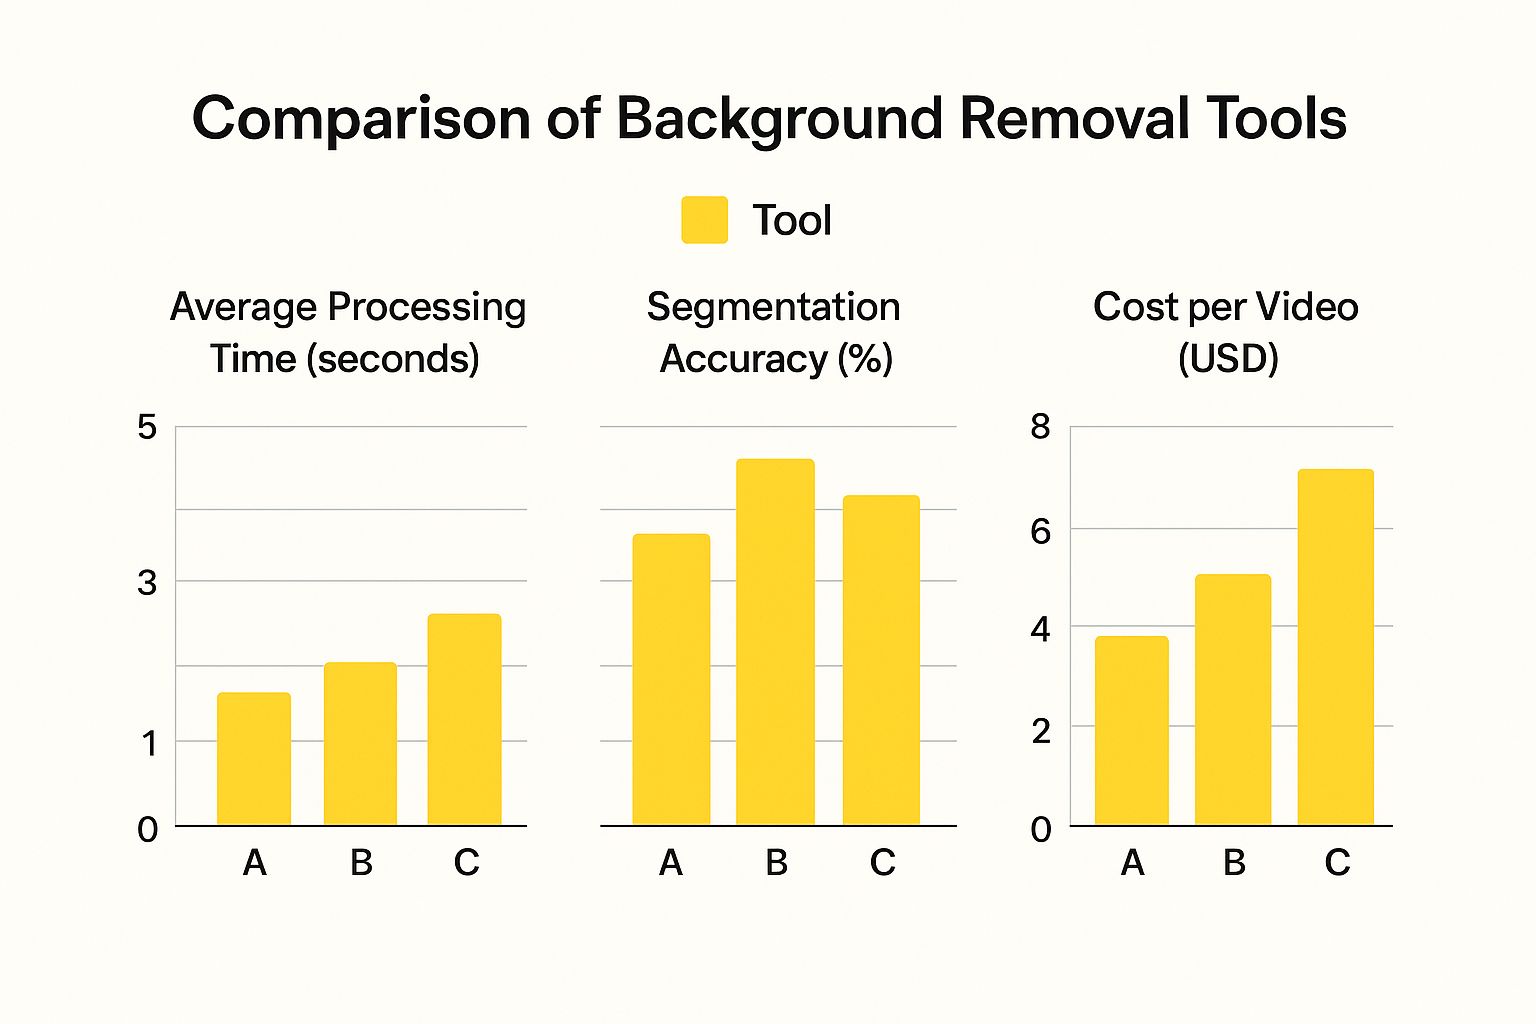
The chart makes it clear. The smartest approach is to figure out your top priority—whether it’s lightning speed for a TikTok video or perfect precision for a corporate training module—and choose your tool based on that.
Setting Up Your Video For Clean Background Removal
The real secret to a flawless video remove background effect isn’t buried in some advanced software menu—it’s decided long before you even press the record button. The quality of your original footage is the single most important factor that will make or break your results. While today’s AI tools are incredibly capable, they aren’t magic. They need clear visual information to tell the difference between you and your background, so giving them a clean starting point is crucial.
Get Your Lighting and Camera Dialed In
Your main job here is to create as much clear separation as possible between your subject (you!) and whatever is behind you. This means lighting yourself well, but it’s just as important to light your background evenly. Harsh shadows are a huge problem. If you cast a dark shadow on the wall behind you, the AI might get confused and think that shadow is part of your body, which leads to a messy, unprofessional cutout.
On the camera front, think fast. A faster shutter speed will be your best friend because it dramatically reduces motion blur. That slight blur on your hands when you gesture might seem minor, but to an AI, it’s a fuzzy edge that’s nearly impossible to key out cleanly. Always try to film in the highest resolution and bitrate your camera can handle. More data gives the AI more information to work with, making an accurate cutout much more likely.
What to Wear and How to Tame That Hair
Believe it or not, your wardrobe choice can make a big difference. You want to avoid wearing colors that are too similar to your background. The classic advice is "don't wear green in front of a green screen," and that logic applies everywhere. If you're in front of a beige wall, a beige shirt is a bad idea. Solid colors are almost always a better choice than busy patterns, which can confuse the software.
Fine, wispy hair is the final boss of any background removal tool. While modern algorithms are getting better at handling it, you can make their job much easier. Simply tying hair back or using a bit of hairspray to manage flyaways can be the difference between a crisp, professional edge and a weird, flickering halo effect around your head.
The thinking behind all this prep work is perfectly shown in traditional chroma keying. This image of a classic green screen setup is designed for one thing: perfect separation.
See how the green is incredibly uniform and brightly lit? There are no shadows or shifts in color. That’s what lets software easily identify and delete it. The same principle applies to AI removal—the cleaner your starting footage, the better your final video will look.
Working With What You've Got: Quick Fixes
So, what happens if you’re stuck with footage that wasn’t shot with background removal in mind? All is not lost. You can still salvage it with a few simple tricks before you even touch the removal tool.
Try doing some basic color correction first. Just by increasing the contrast, you can help the software see a clearer line between your subject and the background. If the video is a bit shaky, run it through a stabilization filter. Shaky footage creates unpredictable motion blur from frame to frame, which throws the AI for a loop. A stable shot gives the tool a consistent image to analyze, often resulting in a much cleaner final product.
Getting Professional Results From Your Background Removal
Once your footage is prepped, it's time to get into the software. While a one-click video remove background feature is a great start, the real craft is in the subtle adjustments you make afterward. Turning a decent result into a seamless one is all about the details.
Fine-Tuning Your Key
Most automated tools give you a solid starting point, but the edges of your subject will almost always need some refinement. Think of the initial removal as a rough cut. The finishing work is where you adjust the key or mask—the outline that separates your subject from the background.
You'll typically work with settings like edge feathering, which softens the transition, and mask expansion (also called choke or shift edge), which pulls the mask's boundary in or out. If you notice a thin, distracting halo around your subject, slightly "choking" the mask inward by a few pixels can make it disappear.
Professional tools like Adobe Premiere Pro give you a dedicated workspace for these precise adjustments. You get a whole panel of controls instead of a single button.
This interface shows sliders for feathering, contrast, and edge shifting, which allows an editor to get rid of that obvious "cutout" look that screams amateur.
Handling Complex Scenarios Like Hair and Motion
Hair and motion blur are the classic challenges that separate good results from truly great ones. For fine, flowing hair, a single mask often looks chunky and fake. A better technique is to create multiple masks: one tight, clean mask for the body and a separate, much softer, feathered mask just for the hair. Tools like the Roto Brush in Adobe After Effects are perfect for this, letting you manually paint your selection in problem areas where the AI gets confused.
When it comes to motion blur, trying to get a perfectly sharp edge on a fast-moving hand is a losing battle that just looks unnatural. A better approach is to get a clean key on the subject and then add a touch of directional motion blur back onto the moving parts to make the action feel integrated and dynamic.
Advanced Workflows and Batch Processing
When you're working with multiple clips shot in the same environment, you can save a massive amount of time. Once you perfect the settings for one clip, you can often copy and paste that effect onto all the others for consistent results.
Another pro time-saver is using a garbage matte—a quick, rough mask to block out large, static parts of the background before the AI even starts. This focuses the tool’s processing power on the complex edges around your subject. This principle of isolating and removing specific elements is key to all kinds of video cleanup. If you're interested, we have a helpful guide on how to remove unwanted text from a video that uses a similar logic.
The final secret is that the job isn't done after the removal. The final 5% of the work is always compositing. This means making tiny color adjustments to your subject so their lighting and color temperature match the new background. A subject filmed under warm indoor light will look jarringly out of place against a cool, outdoor scene until you apply a subtle color correction to blend them together. This last step is what truly sells the illusion and creates a believable final product.
Creating Convincing Composite Videos That Look Natural
So you've successfully removed the background from your video. That's a great first step, but the real magic begins now. The art of blending your subject into a new environment is called compositing, and it's what separates a professional-looking video from an obvious fake.
Getting this right is all about creating a convincing illusion. You need to carefully match details like light, color, and perspective to make your audience believe the subject and the background belong together in the same world.
Matching Your Subject to the New Scene
Have you ever watched a video where something just looked… off? Chances are, it was the lighting. Mismatched lighting is the fastest way to ruin a composite. If your background is lit from the left, but your subject is clearly lit from the right, the illusion is shattered instantly.
Before you even drop your subject into the new scene, take a moment to study the background. Is the main light source coming from the sun, making it harsh and direct? Or is it a soft, diffused light from an office window? You need to make sure the lighting on your subject mirrors this.
Shadows are just as important. A subject without a shadow looks like they’re floating in space. While a basic drop shadow is a start, a truly realistic composite requires shadows that match the direction and sharpness of the background's lighting.
Finally, let's talk color. Placing a subject filmed under warm, yellow light into a cool, blue-toned background will always look out of place. This is where a subtle color grade comes in. Applying a color adjustment to your subject helps unify the entire shot, acting as the final glue that makes everything look cohesive.
Sourcing and Enhancing Your Backgrounds
A great composite isn't just about the subject; the background you choose is equally important. It's easy to just grab the first free stock video you find, but these can often look generic and make your video feel cheap. For a more polished and unique look, try using a high-quality still image and adding your own subtle motion.
Here are a few simple tricks to bring a static background to life:
- Subtle Animation: Add a very slow zoom or pan to the background. This small movement mimics a real camera and prevents the shot from feeling lifeless and flat.
- Camera Shake: A tiny bit of camera shake can do wonders. It helps "glue" the foreground and background together, making it look like they were captured by the same camera at the same time.
- Depth of Field: To create a realistic sense of depth, make sure your background is slightly out of focus. If your subject is sharp, the background should be a little blurry, just like it would be with a real camera lens.
This is particularly important for branded videos or custom backdrops, where the goal is to look professional without being distracting. Thankfully, you don't need to be a graphic designer to create a polished virtual background. Tools like Canva make it incredibly easy to design custom, branded environments that look great on camera.
The key to a great background is always subtlety. It should support your message, not scream for attention and overpower your subject. Nailing this balance is what elevates your video from a simple green screen trick to a professional-looking composite.
Solving Problems When Background Removal Goes Wrong
Even with the best preparation, trying to remove the background from a video doesn't always go smoothly. You'll eventually run into footage that just doesn't want to cooperate, leaving you with annoying artifacts. The usual suspects are tricky textures like fine hair, the blur from quick movements, bad lighting, and shiny surfaces that can fool even the smartest software. When this happens, don't throw in the towel; it's time to troubleshoot and save your shot.
Tackling Tricky Edges and Motion
Fine, wispy hair is probably the number one headache in background removal. Instead of trying to get one single, perfect key that ends up giving your subject a helmet-head look, a layered approach works wonders. Use a tight, clean mask for the person's body, and then create a second, much softer and more feathered mask just for the hair. This lets the hair blend in more naturally without that harsh, cut-out edge.
Motion blur is another common challenge. If a hand moves quickly across the screen, trying to get a perfectly sharp edge will just look fake and jarring. A much better solution is to get a clean key on the subject’s body and then add a little directional motion blur back onto the moving parts. This makes the action feel natural and integrated with the new background.
When Your Source Footage Is the Problem
Sometimes, the tool isn't to blame—it's the video file you're starting with. If you're stuck with poorly lit footage and a reshoot isn't an option, all is not lost. Before you even attempt the background removal, do some basic color correction. Just boosting the contrast can create a much clearer separation between your subject and the background, giving the software a much better chance of success.
Reflective surfaces like eyeglasses or shiny jewelry are another pain, often creating weird, distracting artifacts. For these small, specific problem areas, your best bet might be to manually mask them out frame by frame. It's tedious, for sure, but it’s often the most reliable last resort for getting that perfectly clean final shot.
Navigating Technical Errors and Glitches
Then there are the days when the problems are purely technical: processing errors, incompatible files, or a sudden drop in quality when you export. It's incredibly frustrating to wait for a long render only to see an error pop up.
A "processing failed" message like this one usually points to a technical mismatch. Before you get too discouraged, try these quick fixes:
- Check Formats: Make sure your video is in a standard format, like H.264 MP4. Less common codecs are often the source of processing issues.
- Lower the Resolution: Try exporting a test at 720p. If that works, it's a sign that your system might be struggling with a higher resolution like 4K.
- Process in Chunks: If a particularly long video keeps failing, try exporting it in smaller segments instead of all at once.
These troubleshooting skills are useful for all sorts of video editing tasks. In fact, if you’re cleaning up other visual elements, check out our guide on how to remove unwanted text from a video.
Key Takeaways

If you're looking for a one-click magic wand to perfectly remove your video background, I have some news for you. The real magic happens in the details—a thoughtful process that starts long before you even press record and finishes with the small adjustments that make your final video look believable.
Your Roadmap to Clean Results
-
Preparation Is Everything: The most important part of removing a background happens before you ever touch any software. Getting your shot right from the start saves hours of frustration later. Focus on good, even lighting on yourself and your background to avoid tricky shadows. You'll also want to use a fast shutter speed to reduce motion blur—that's the number one enemy of clean, sharp edges. A pro tip: wear a solid-colored shirt, as busy patterns can confuse the software.
-
Match the Tool to the Task: It's easy to get caught up in fancy ads, but the right tool really depends on your project. Free online removers are great for a quick social media post or just messing around. But when quality matters, you’ll need to step up to professional software. A program like Adobe Premiere Pro gives you the fine-tuned control over edges and high-quality output that serious projects demand.
-
Refine, Don't Just Rely on AI: Think of the AI's first attempt as a rough draft. Your job is to polish it. The real pro look comes from diving into the settings. Learning to use tools like edge feathering to soften hard lines or "choking" the mask to pull it in slightly can completely get rid of that annoying halo, especially around difficult areas like hair.
The Compositing Checkpoint
Getting the background out is only half the battle. To successfully video remove background means you have to sell the effect and avoid that weird "cut-and-pasted" look. This is where compositing comes in—blending your subject into the new scene.
This means matching the lighting. If your new background has light coming from the left, your subject should, too. You'll need to add believable shadows to make your subject feel like they're actually there, not floating. Finally, a consistent color grade ties everything together. Without these steps, putting a person filmed in a warm room onto a cool, outdoor backdrop will always look fake.
It might sound like a lot, but mastering this process comes down to practice. Focus on these fundamentals: prepare your shot carefully, pick the right tool for your needs, and don't forget the final compositing touches. Keep at it, and you'll be creating incredibly seamless and professional videos that truly capture attention.
And while you're focused on making your videos look amazing, don't forget about your photos! If you ever need to clean up still images by removing unwanted text, check out our free tool at SnapCaptionRemover.