How to Remove Snapchat Location Tag from Photo Easily
That fun little location tag you add to a Snapchat photo might seem harmless, but it's a two-headed beast. You've got the visible geofilter everyone sees, and then there's the hidden GPS data secretly embedded in the image file itself. Just deleting the visual tag isn't enough; if you don't scrub the metadata, you're still leaving a digital breadcrumb trail right to your location.
Why Those Location Tags Are A Bigger Deal Than You Think
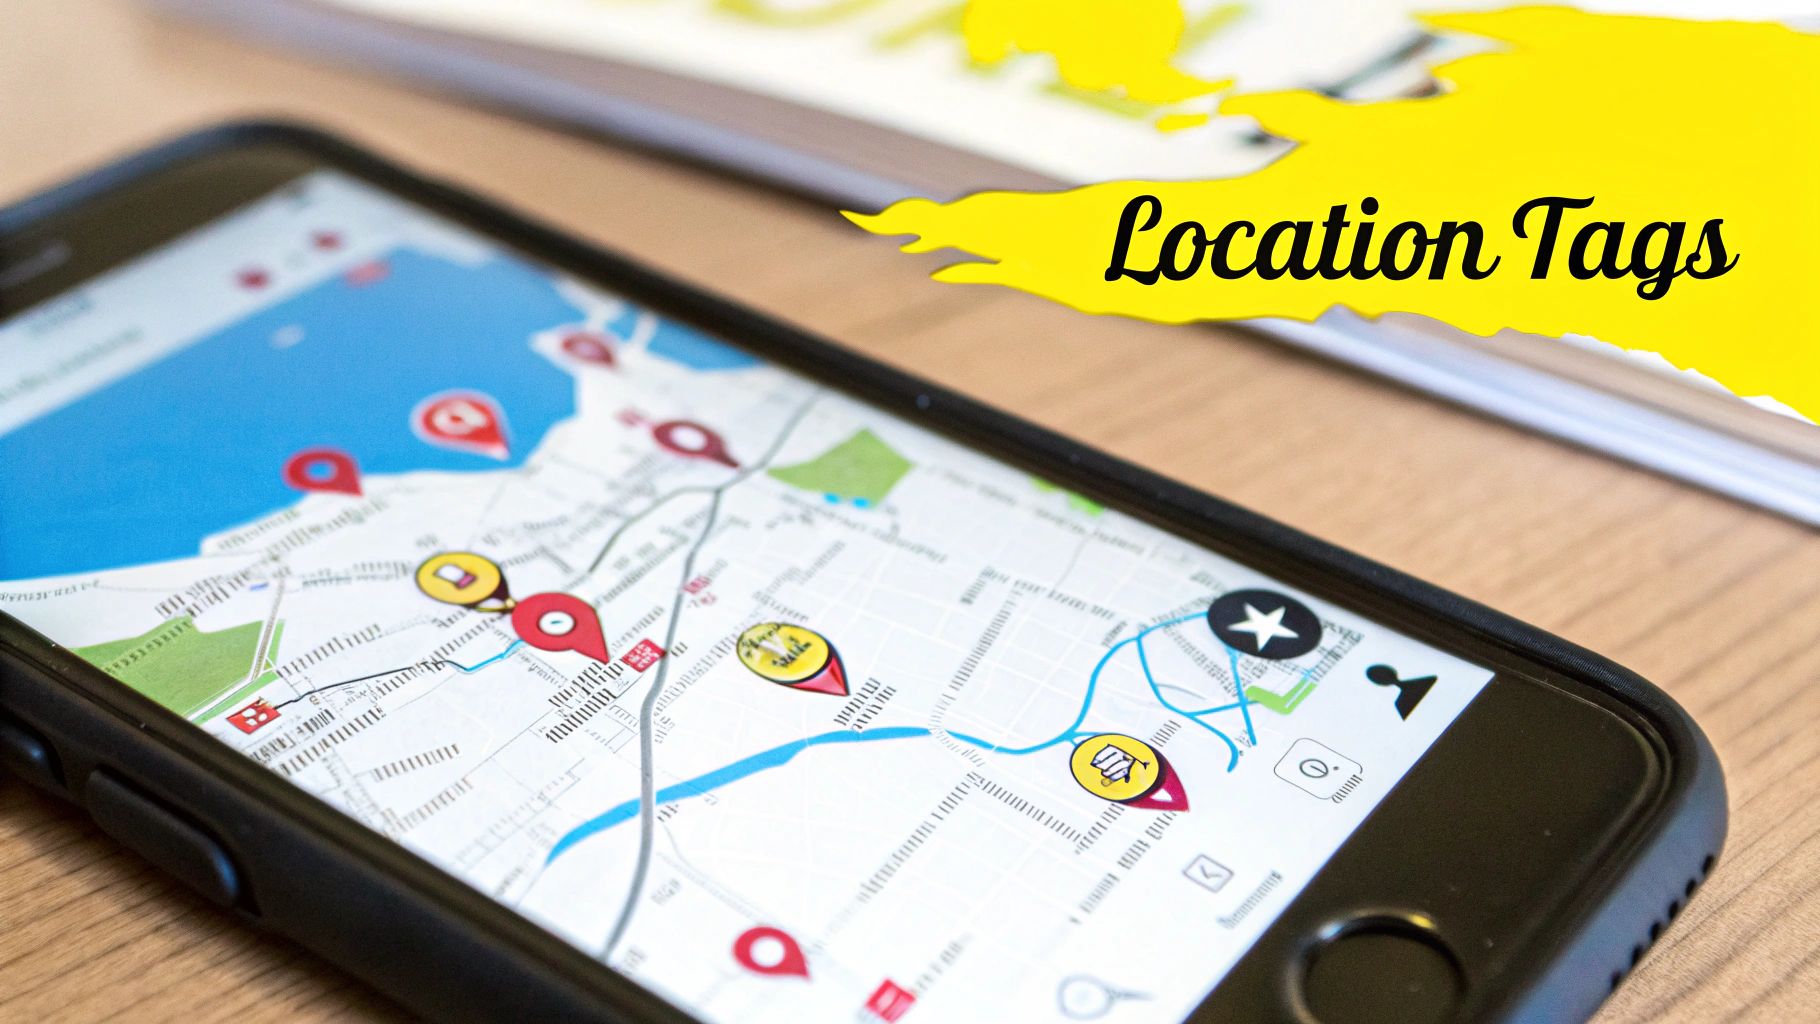
Sharing a photo with a "Downtown" or "Westside" filter does more than just add flair. It broadcasts a piece of your personal puzzle to anyone who sees it. This isn't just about aesthetics—it's a critical part of staying safe online.
Think about the routines you might be accidentally sharing. A daily "Good Morning" snap from the same coffee shop geotag can quickly map out your morning schedule. Photos tagged at your local park every weekend could tell people exactly when your home is empty. For younger users, these tags can unintentionally reveal the location of their school or home, which is a serious safety issue.
The Hidden Data You Can't See
It gets deeper. Beyond the tag you see on the screen, the photo's metadata, often called EXIF data, can contain the precise GPS coordinates of where you took the picture. This hidden information is like leaving a map to your front door stapled to every photo you post.
Anyone with even basic technical know-how can pull this data and find out exactly where you were. This digital footprint can be used for anything from creepy targeted ads to much more serious threats like digital stalking. Taking control of this information is a crucial modern skill.
The scale of this is staggering. As of late 2023, Snapchat's Snap Map feature was used by over 350 million users every month. With the platform now boasting over 850 million monthly users, the sheer volume of shared location data is massive and presents real data protection challenges.
Dealing with this isn't about being paranoid; it's about being smart. Once you've removed a location tag from a saved photo, the next step is good digital hygiene. A great way to start is by learning how to organize your digital photos to keep everything private and in order.
Quick Guide to Removing Location Tags
Here's a quick summary of the two main methods for removing location information from a photo you've saved from Snapchat.
| Removal Method | What It Does |
|---|---|
| SnapCaptionRemover | Erases both the visible location filter and the hidden EXIF metadata. |
| Manual Crop | Cuts out the visible location filter, but leaves the hidden GPS data intact. |
For true privacy, you need a tool that handles both the visual tag and the hidden data. Simply cropping the image only solves half the problem.
Saving Your Snap Without Losing Quality

Before you can scrub a location tag off a Snapchat photo, you need to have a clean, high-quality version of it saved on your phone. How you save it makes all the difference for getting a good result later on.
If it's a new photo you just took, the best move is to hit the "Save" icon—that little downward arrow in the bottom-left corner—before you send it to anyone or add it to your Story. This saves the original, full-resolution image straight to your camera roll.
What about an older photo tucked away in your Snapchat Memories? No problem. Just open up your Memories, select the Snap you want to work on, and tap the three-dot menu. From there, you’ll find an "Export Snap" or "Save to Camera Roll" option. This pulls the best possible version of the picture for editing.
If you want to get really into the weeds on this, we have a complete guide on how to save your Snapchat photos while keeping them crystal clear.
A Quick Metadata Check
Once the photo is safely in your gallery, take a second to see what kind of data is attached to it. This little check tells you whether you're just dealing with a visible location sticker or if there's hidden GPS information baked into the file itself.
On most phones, you can find this right in your standard Photos app. Just open the image and look for an "Info" button (usually an "i" in a circle) or try swiping up.
If GPS data is there, you’ll often see a small map pinpointing the exact spot the photo was taken. Knowing this upfront is a crucial step before you remove the Snapchat location tag from your photo, as it helps you make sure no digital breadcrumbs are left behind.
Getting Rid of Visible Location Geofilters
So, you've got a great photo, but that big, bold location tag from Snapchat is ruining the vibe. You don't need to be a Photoshop wizard to fix this. Believe it or not, you can get rid of it right from your phone, and nobody will ever know it was there.
The secret weapon? A simple mobile app. There are tons of great, free options out there—I'm a big fan of Snapseed myself, but apps like Pixelmator work just as well. What you're looking for is a feature often called the "Healing" or "Repair" tool. This smart little function analyzes the pixels around the tag and cleverly paints over it, seamlessly blending the text into the background.
It's pretty amazing what these tools can do. They make quick work of unwanted elements like geofilters, which, as you can see below, are designed to be a prominent part of the Snapchat experience.
Let's dive into how to use that healing tool to get a perfect finish.
How to Use the Healing Tool Like a Pro
First things first, save your Snap to your camera roll and open it up in your chosen editing app. Find the healing tool—it usually has an icon that looks like a little bandage.
Once you’ve selected it, pinch and zoom in as close as you can to the geofilter. Precision is everything here.
The biggest mistake I see people make is trying to erase the whole tag in one big swipe. Don't do that. Instead, use small, gentle taps or short brush strokes. Let the app do its thing one little section at a time. This approach prevents those ugly, blurry smudges and keeps the background looking natural.
Think about it: if the tag is sitting over a tricky background, like the leaves on a tree or a brick wall, small dabs are the only way to go. It gives the app's algorithm the best chance to accurately guess what the background should look like underneath.
My Go-To Tip: Don't be afraid to hit the "undo" button. It's your best friend. If a brush stroke looks off, just undo it and try again. A little trial and error is all it takes to get a result that looks completely clean.
A Few More Tricks for a Flawless Edit
Getting that perfect, invisible removal really comes down to technique. If you keep these pointers in mind, you’ll avoid the common rookie mistakes.
- Start from the outside and work your way in. I always begin by erasing the very edges of the letters first. This helps establish a clean border with the background before you tackle the main part of the text, making the final blend much smoother.
- Change your brush size. Most apps let you adjust this. A smaller brush gives you way more control, especially for the delicate parts of the text. Try to match the brush size to the thickness of the letters you're erasing.
- Zoom in and out constantly. Once you think you’re finished, zoom all the way out to see how the photo looks at its normal size. Then, zoom back in to hunt for any little smudges or imperfections. This double-check ensures your edit is truly undetectable.
Honestly, the most important thing is just to be patient. If you rush it, the edit will look rushed. Take your time, make small, deliberate adjustments, and focus on making it look like that tag was never there to begin with.
Going Deeper: Removing Hidden GPS Data From Your Photo
Getting rid of the visible geofilter on your Snap is a good start, but it’s only half the battle. The real privacy concern is often lurking where you can't see it: the EXIF data. Think of this as a hidden digital footprint embedded in the photo file itself, containing details like the exact GPS coordinates of where you took the picture.
Even if your visual edit is perfect, this metadata can still give away your location. Someone with the right software can easily pull that data and figure out exactly where you were. That's why it's crucial to remove the Snapchat location tag on a much deeper level.
The best defense is a good offense—proactively managing your location settings so the tag never gets added in the first place.
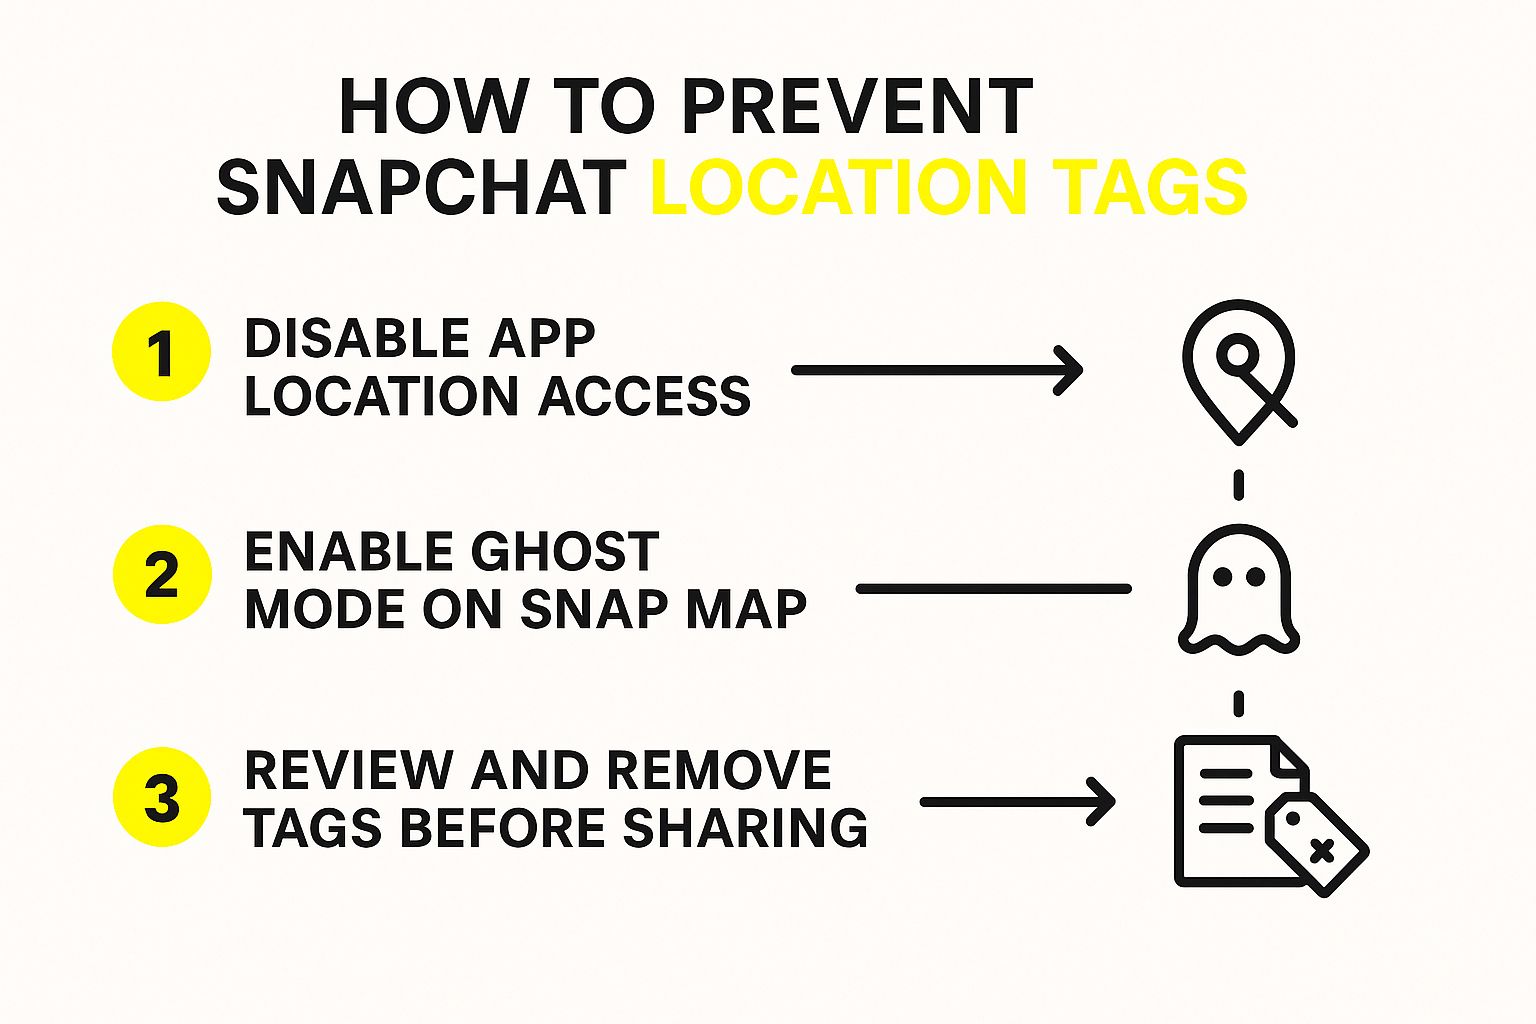
As you can see, combining steps like disabling app permissions and using Snapchat’s own Ghost Mode is the most effective way to protect yourself. But what about the photos you've already saved? Let's walk through how to scrub that data now.
Stripping Location Data on an iPhone
If you're an iPhone user, you're in luck. Apple makes it surprisingly easy to remove this hidden GPS data right from the Photos app, no extra downloads needed.
- First, open the Photos app and find the saved Snapchat image you want to clean up.
- Once it's open, just swipe up on the photo or tap the small "i" icon at the bottom of the screen. This brings up the information panel.
- You'll see a little map showing the photo's location. Tap "Adjust" right beside it.
- On the next screen, simply select "No Location." That's it! The GPS data is gone.
Pro Tip: If you have a bunch of photos to fix, you can do them all at once. Select multiple images in your library, tap the three-dot menu icon, and use the "Adjust Location" feature to remove the data from the entire batch in one go.
Handling Metadata on Android Devices
Things can be a bit more fragmented in the Android world. While some native gallery apps like Google Photos let you remove location info, the feature isn't always available or easy to find, as it varies from one phone maker to another.
Your best bet here is to use a dedicated EXIF editor app from the Google Play Store. Search for terms like "EXIF removal" or "metadata stripper" and pick an app with solid reviews. These tools are built specifically for this job and give you total control to view and erase all the hidden data—not just location, but also camera settings and timestamps—without degrading your picture quality.
After you've secured your photo's privacy, you might want to spruce it up with other edits. For more tips on making your pictures pop, check out our guide on how to edit photos online.
Take Control of Your Snapchat Privacy
While it’s great to know how to zap a location tag from a photo you've already taken, an even better strategy is to stop it from appearing in the first place. A few smart, proactive moves can save you a lot of hassle and keep your location private by default.
Think of it as shifting from damage control to prevention. The most effective way to lock things down is by tweaking your phone's main permissions.
Turn Off Snapchat’s Location Access
Your best defense isn't actually in the Snapchat app—it's buried in your phone's settings. By simply telling your phone not to share your GPS data with Snapchat, you cut off its ability to ever know where you are.
Here’s how you do it:
- Open your phone’s main Settings app.
- Navigate to the Privacy section, then tap on Location Services.
- Scroll down until you find Snapchat in your list of apps.
- Change its permission to “Never.”
That’s it. This one small change ensures the app can't automatically add a location sticker to your future Snaps.
This is a bigger deal than it might seem. Snapchat’s advertising network can reach a staggering 709 million users around the globe, and a huge chunk of that audience is young people. With a user base that massive, features like Ghost Mode and tight privacy controls are more important than ever.
Get Invisible with Ghost Mode
Inside Snapchat, the Snap Map feature shares your live location with friends, which might be more than you're comfortable with. The solution is Ghost Mode, which essentially makes you invisible on the map.
To enable it, just open your Snap Map, tap the settings icon (the little gear), and switch on Ghost Mode. You can still see your friends, but they can't see you.
Of course, Snapchat isn't the only app tracking your data. It's always a good habit to review privacy policies for the other apps and services you use to get a full picture of how your information is being handled.
Still Have Questions About Removing Location Tags?
It's one thing to know the steps, but a few "what ifs" always seem to come up. Let's walk through some of the most common questions I hear from people trying to clean up their Snapchat photos.
Will This Mess Up My Photo Quality?
This is probably the biggest concern, and the short answer is no—as long as you're using the right approach. When you're dealing with the visible geofilter on the image, a good healing or repair tool is designed to blend the surrounding pixels flawlessly. You shouldn't see any drop in quality.
When it comes to the hidden GPS data, the process is even more straightforward. Metadata removal tools work on the text-based information embedded in the file. They don't alter the actual pixels of your picture one bit, so your photo's quality stays 100% intact.
Can Anyone Tell I Edited the Location Out?
Honestly, it's highly unlikely. If you take your time and use small, precise edits to remove a visible geofilter, the result will look completely natural. The average person scrolling through their feed won't notice a thing.
The key is to avoid creating a blurry smudge where the tag used to be. A little patience goes a long way. The goal is for the photo to look like it never had a location tag in the first place.
What If I Already Posted the Snap?
Ah, this is the one catch. Once a Snap is live on your Story or you've sent it to a friend, you can't go back and edit it. The content is locked in.
If you've already posted it, here’s what you need to do:
- First, delete the Snap from your Story.
- Next, find the original photo saved in your phone’s camera roll and edit the location tag out.
- Finally, repost the clean version.
Ready to clean up your saved Snaps without the hassle? SnapCaptionRemover uses AI to instantly and automatically erase unwanted text, including location tags, giving you a perfect photo in seconds. Try it for free at SnapCaptionRemover.com.